Business Owner Guide
Set up and manage your ScanDine restaurant
Create your account
Go to scandine.app and click "Get started free". Enter your name, email, password, and restaurant name. Your account is ready in seconds — no credit card required.
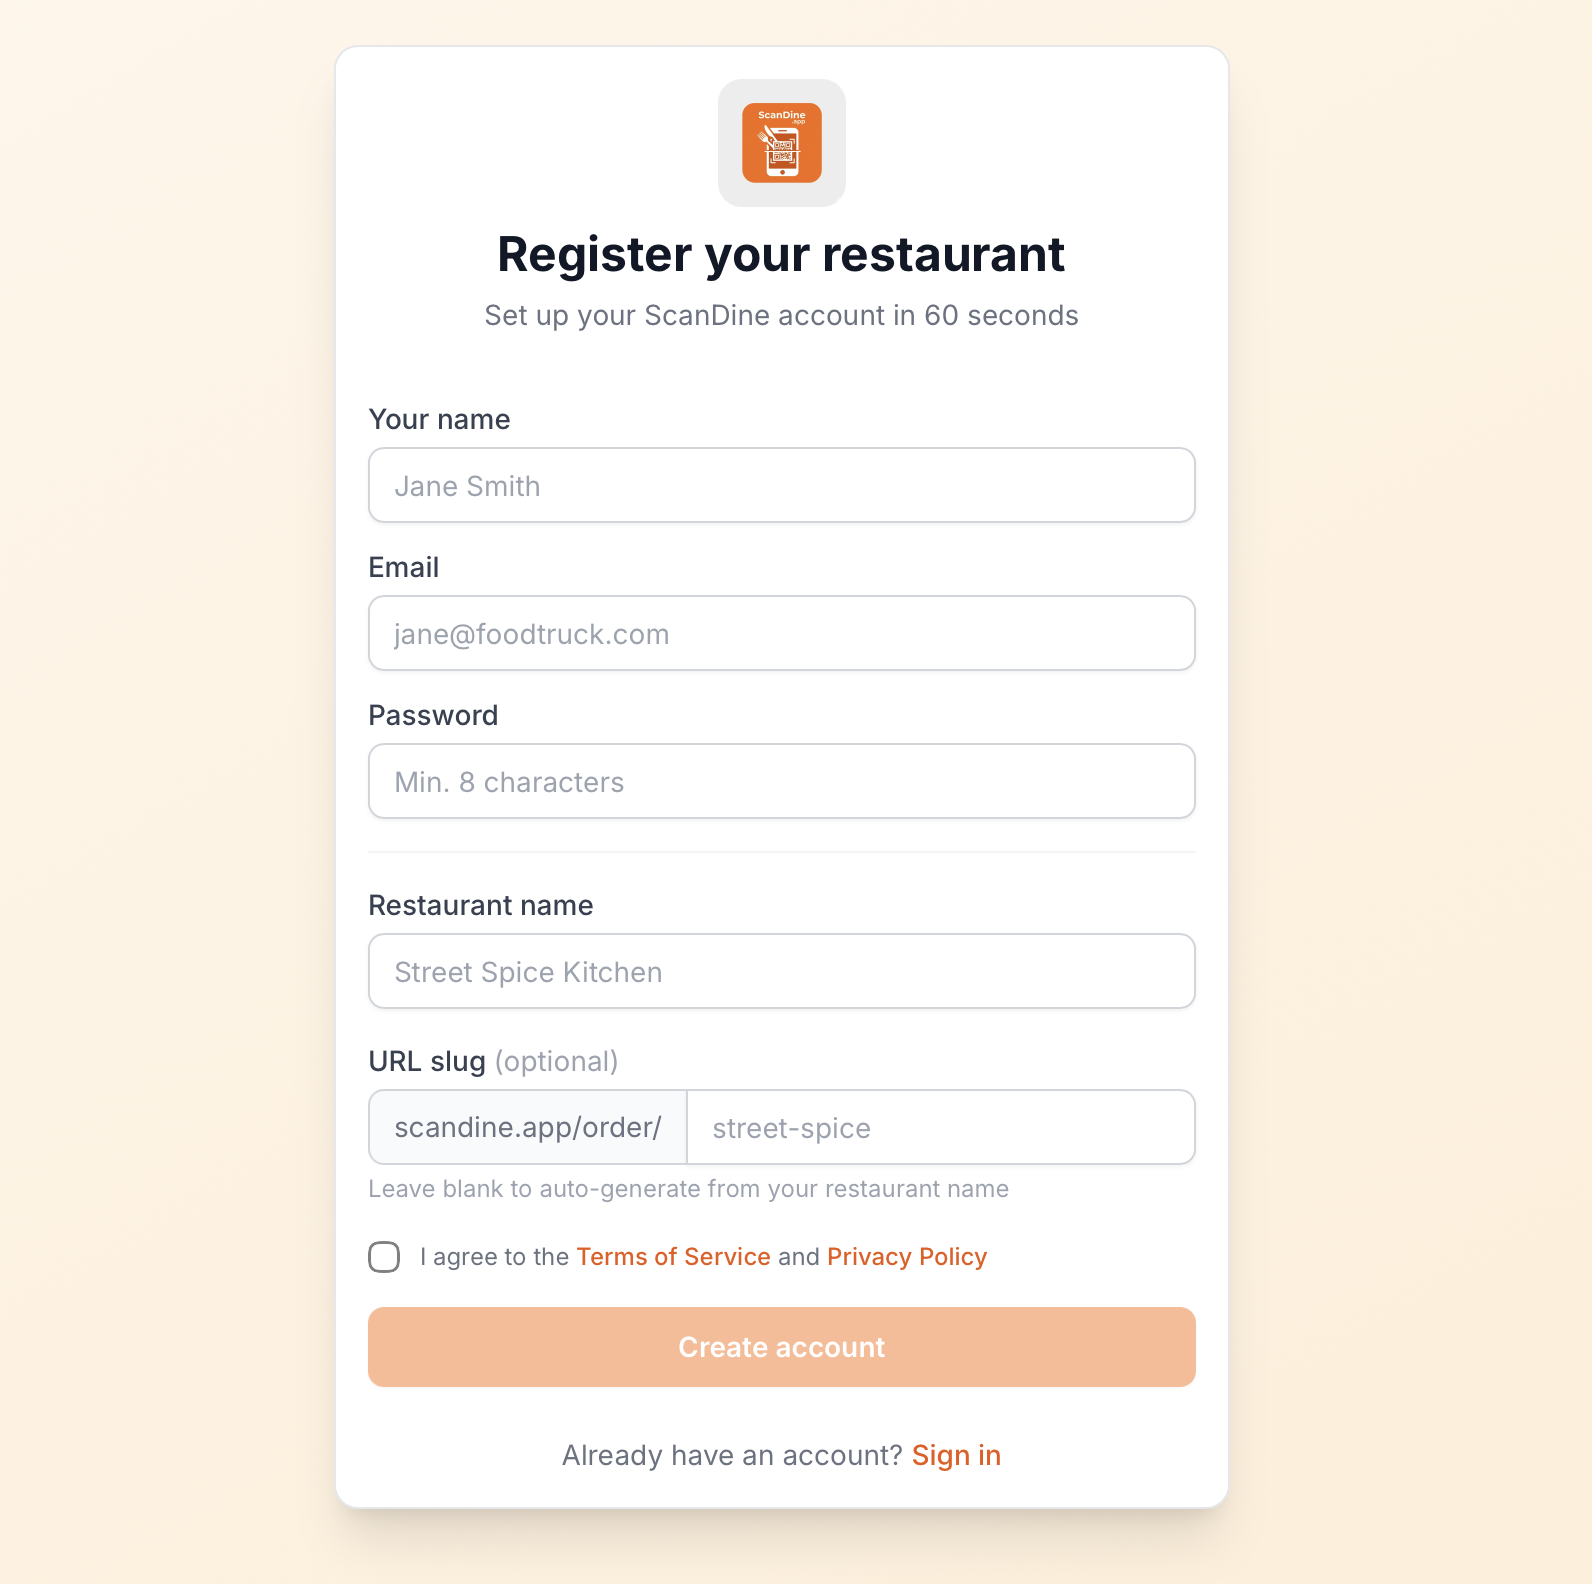
Your restaurant URL slug is auto-generated from your restaurant name. You can customise it during sign-up.
Set up your restaurant profile
Go to Settings to add your restaurant description, phone number, address, currency, and brand colour. Upload your logo and a banner image (Starter plan and above).
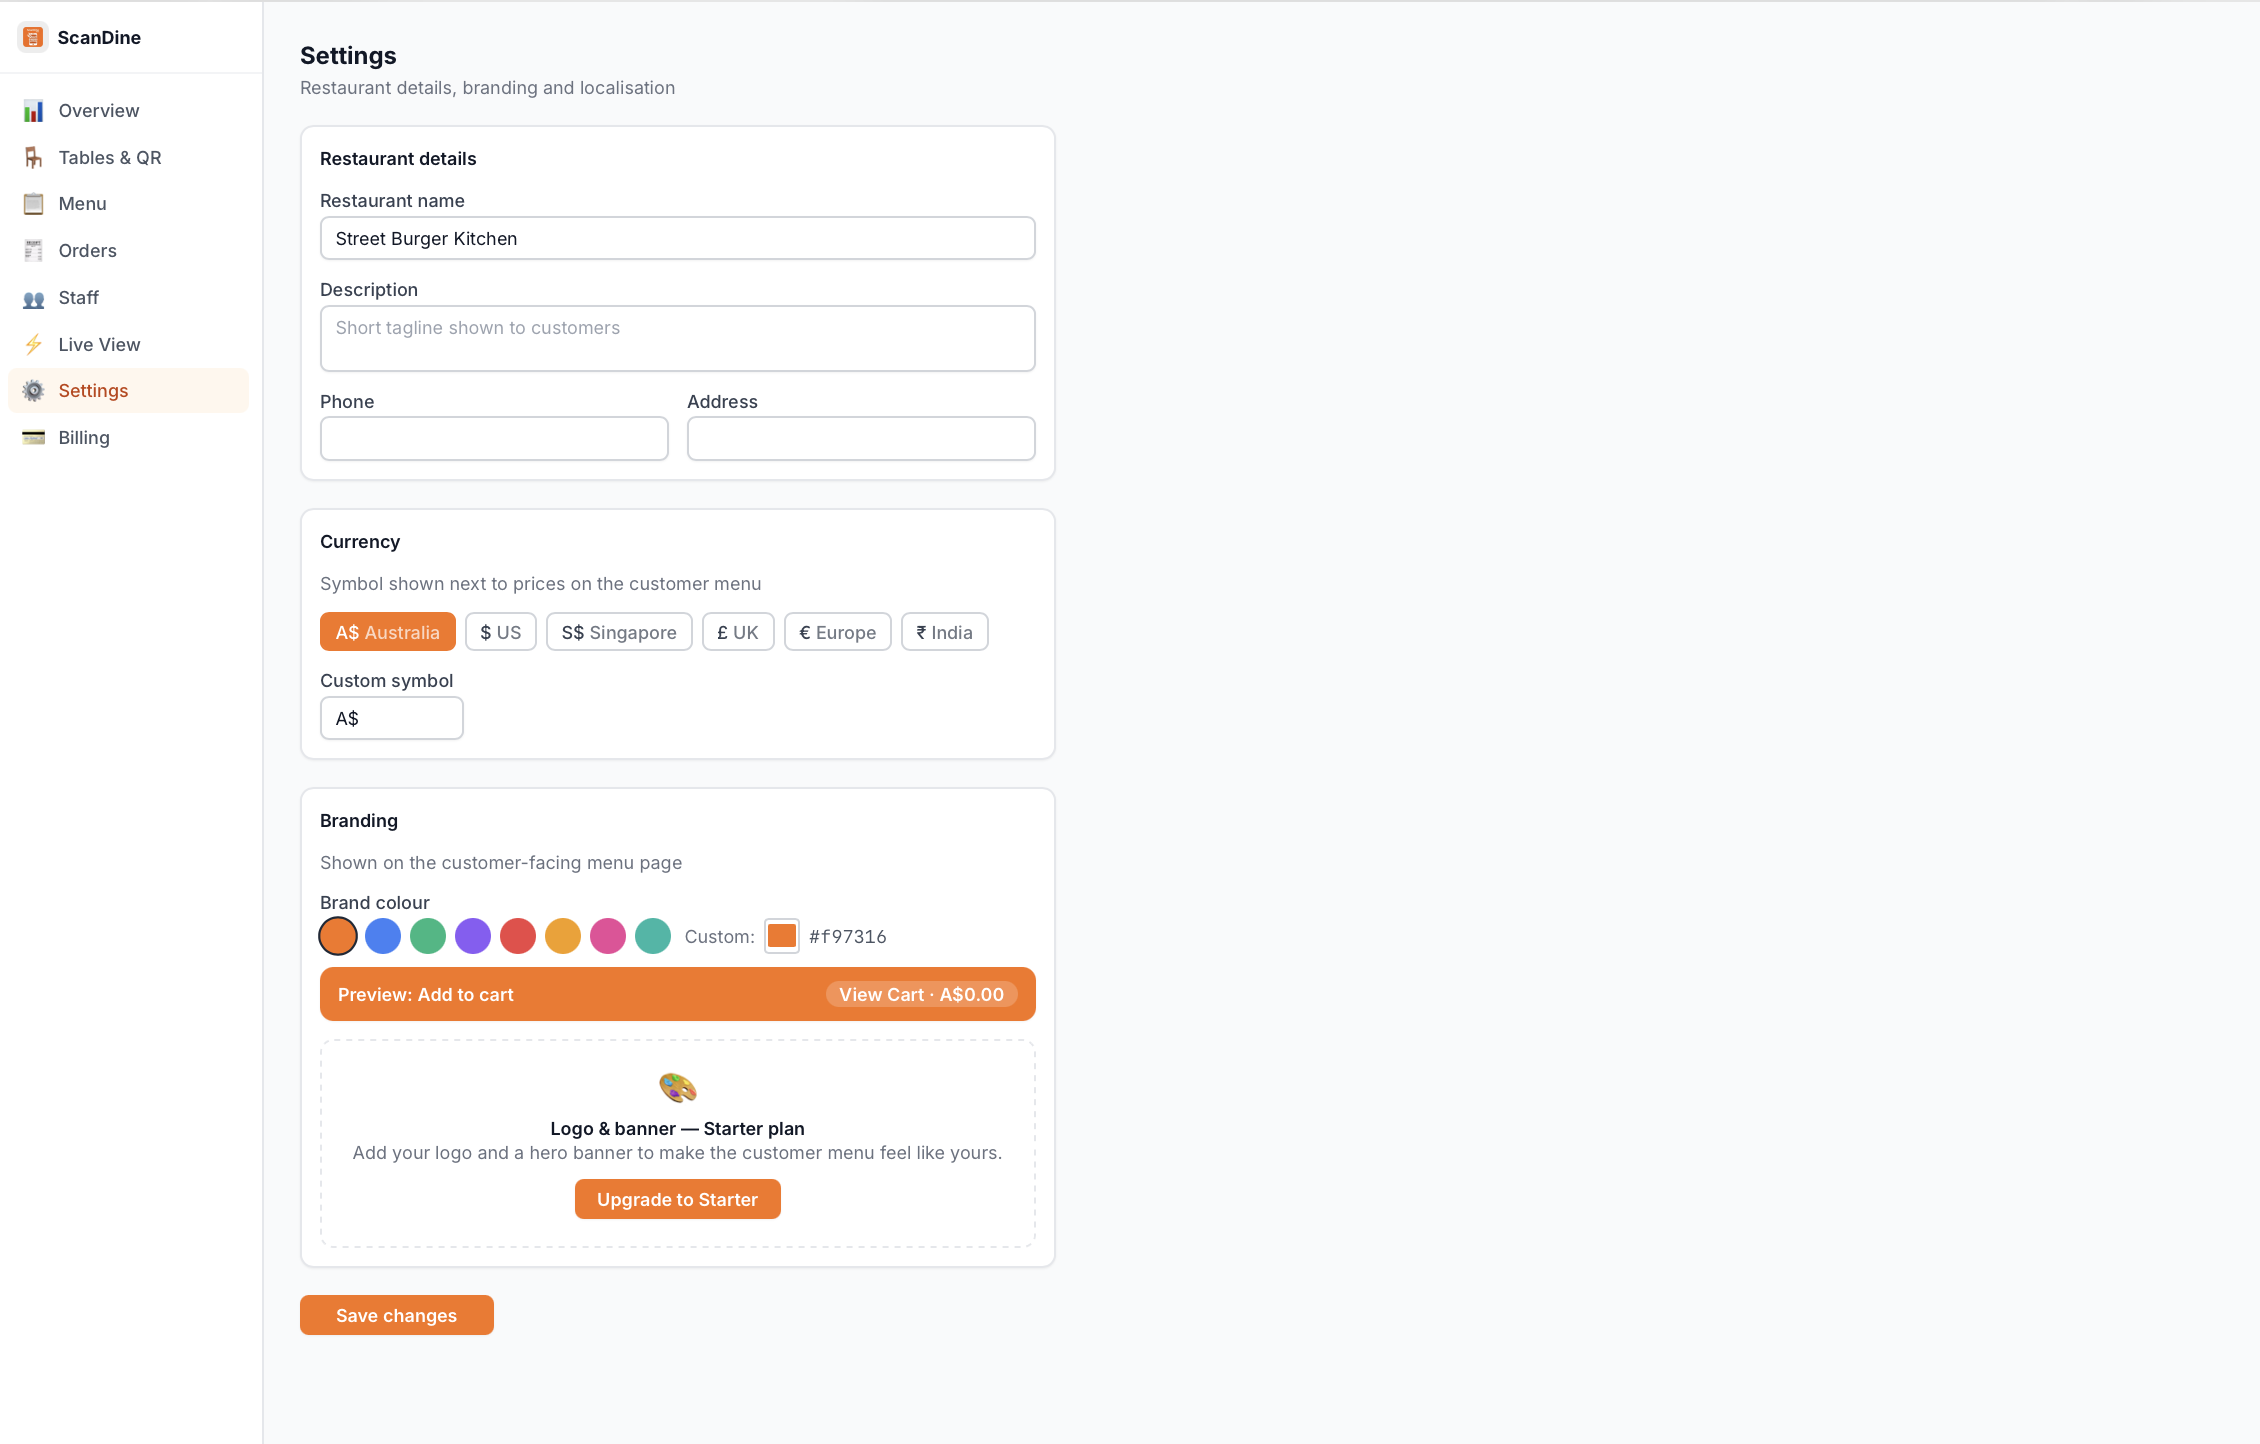
Your brand colour is used as the accent colour on the customer ordering page.
Build your menu
Go to Menu → Add Category to create sections (e.g. Starters, Mains, Drinks). Then add items within each category — name, description, price, and a photo.
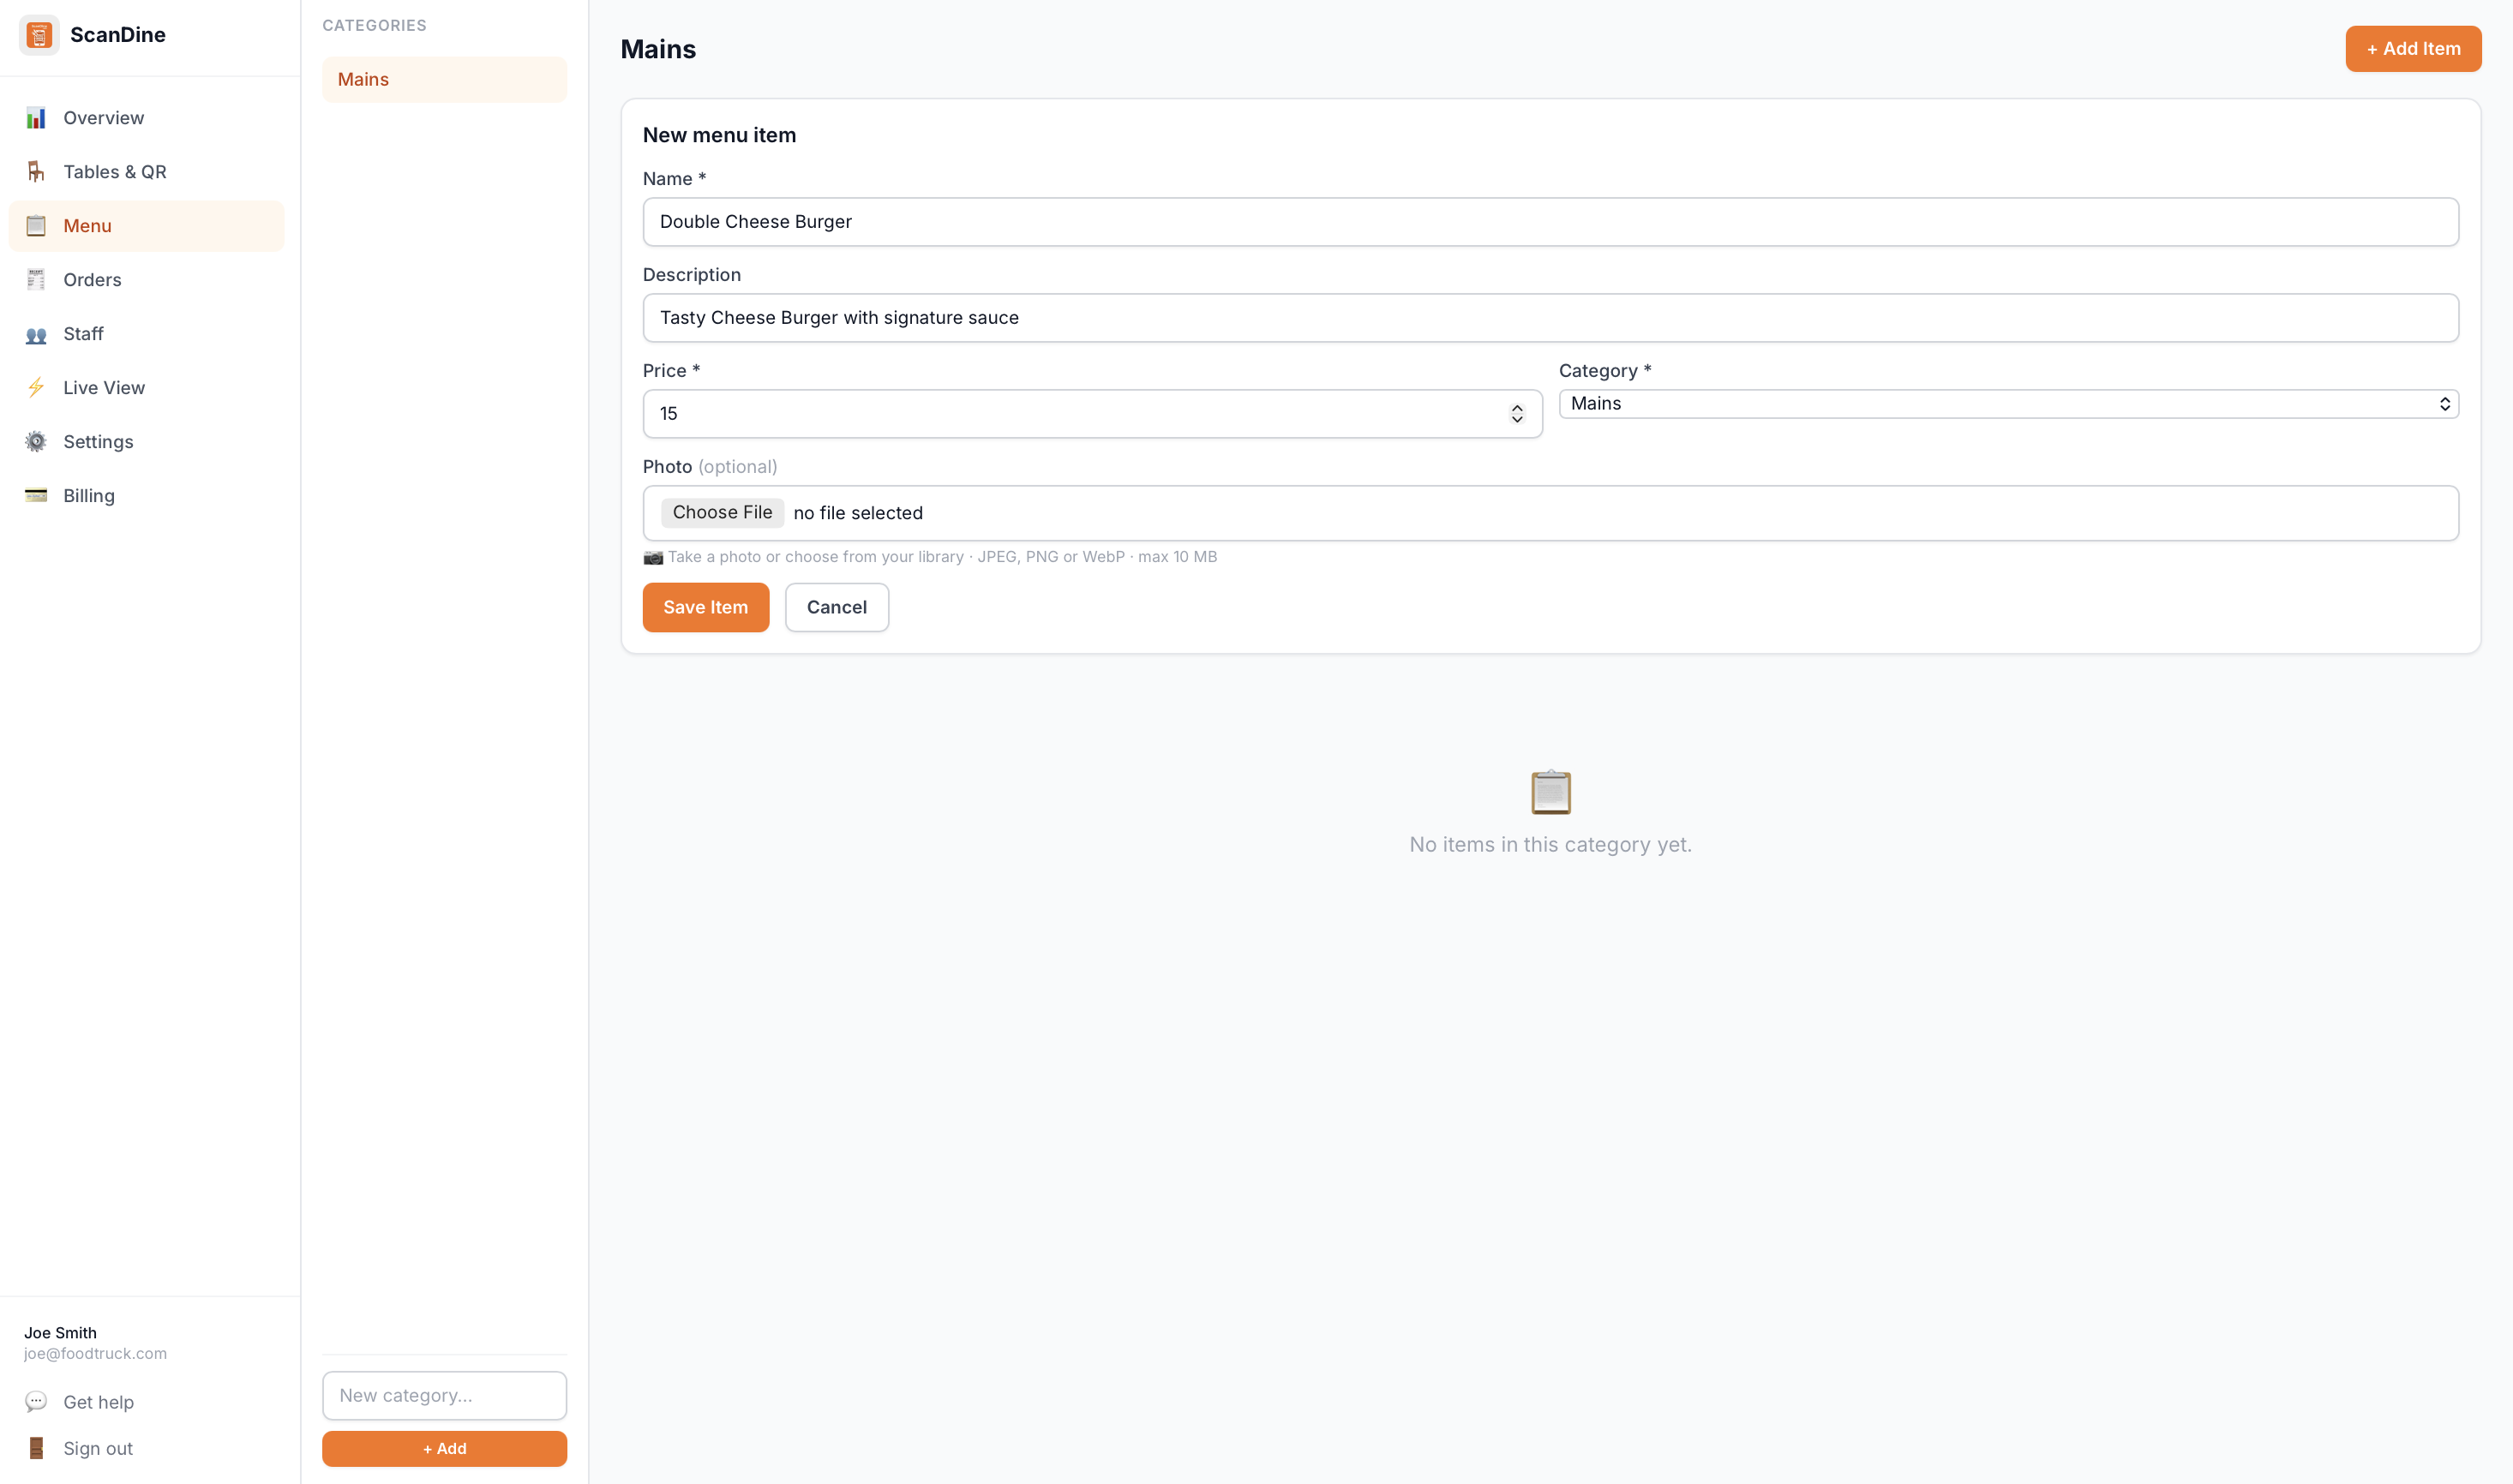
Photos are automatically compressed and optimised. A good photo increases order value.
Set up your tables
Go to Tables → Add Table for each table in your venue. Give each a number and optional label (e.g. "Window seat"). Drag tables on the floor plan to match your layout.
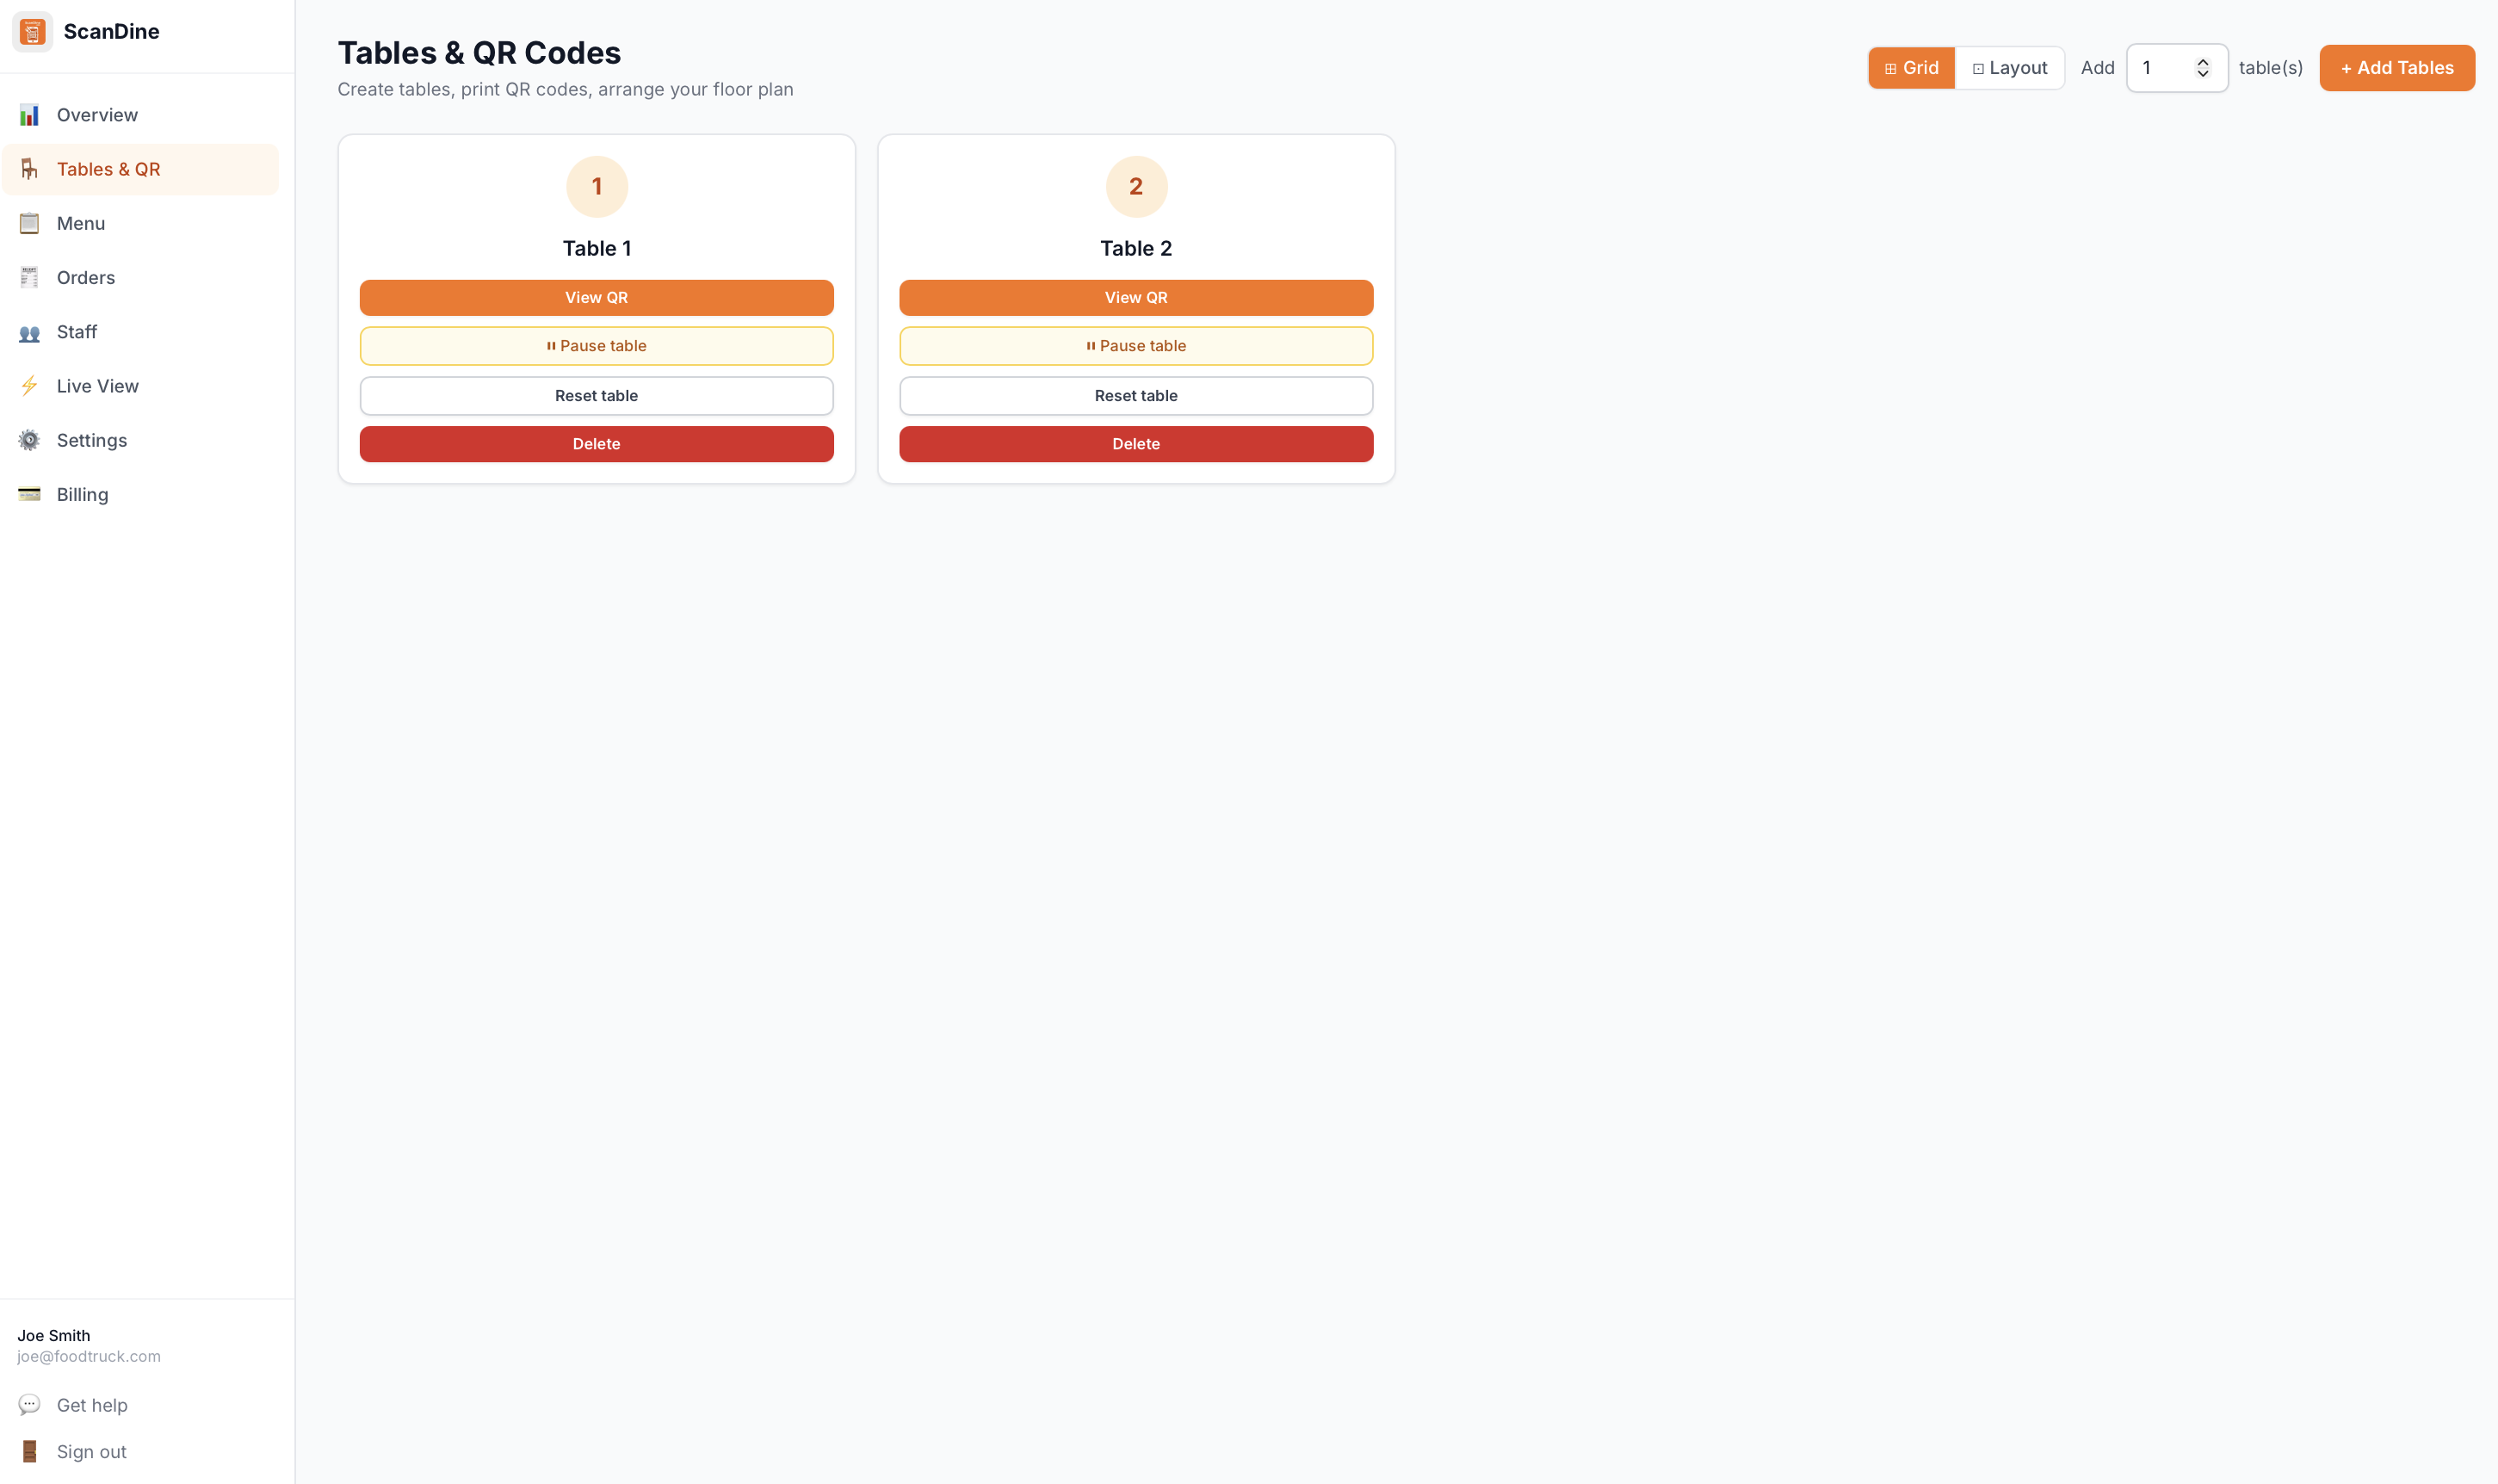
Free plan: up to 3 tables. Starter: up to 20. Pro: unlimited.
Print your QR codes
Click the QR icon next to any table to download a print-ready QR card. Place it on the table. Customers scan it to open the menu instantly — no app download needed.
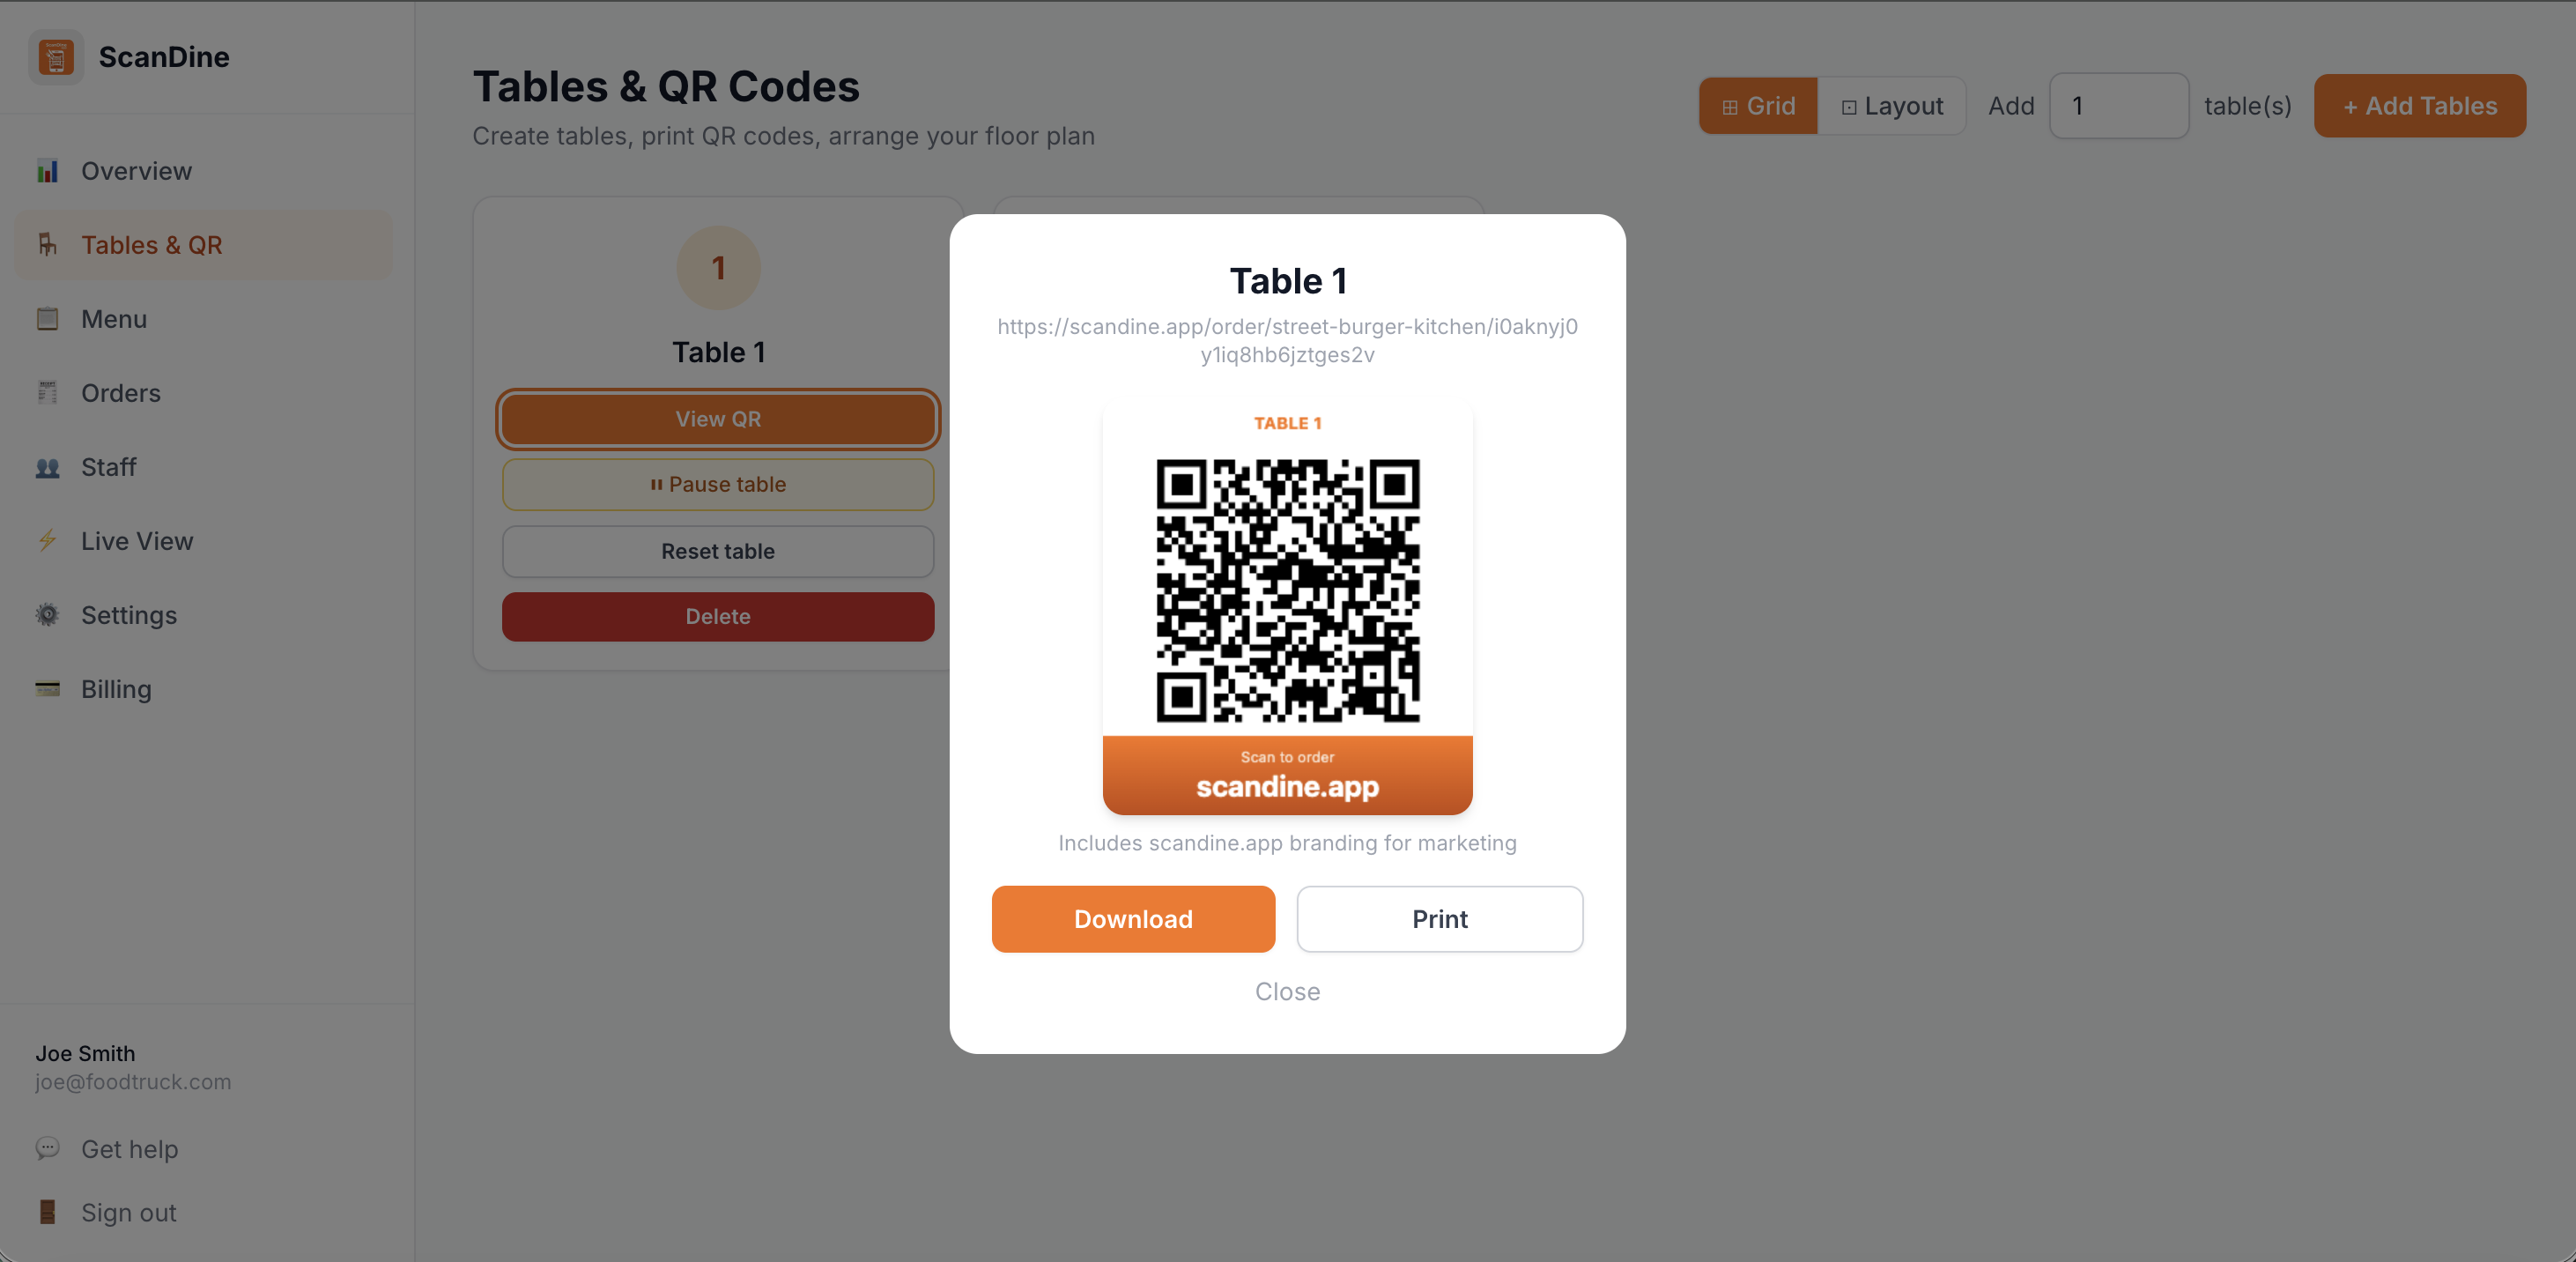
Print on card stock and laminate for durability. Replace if the table number changes.
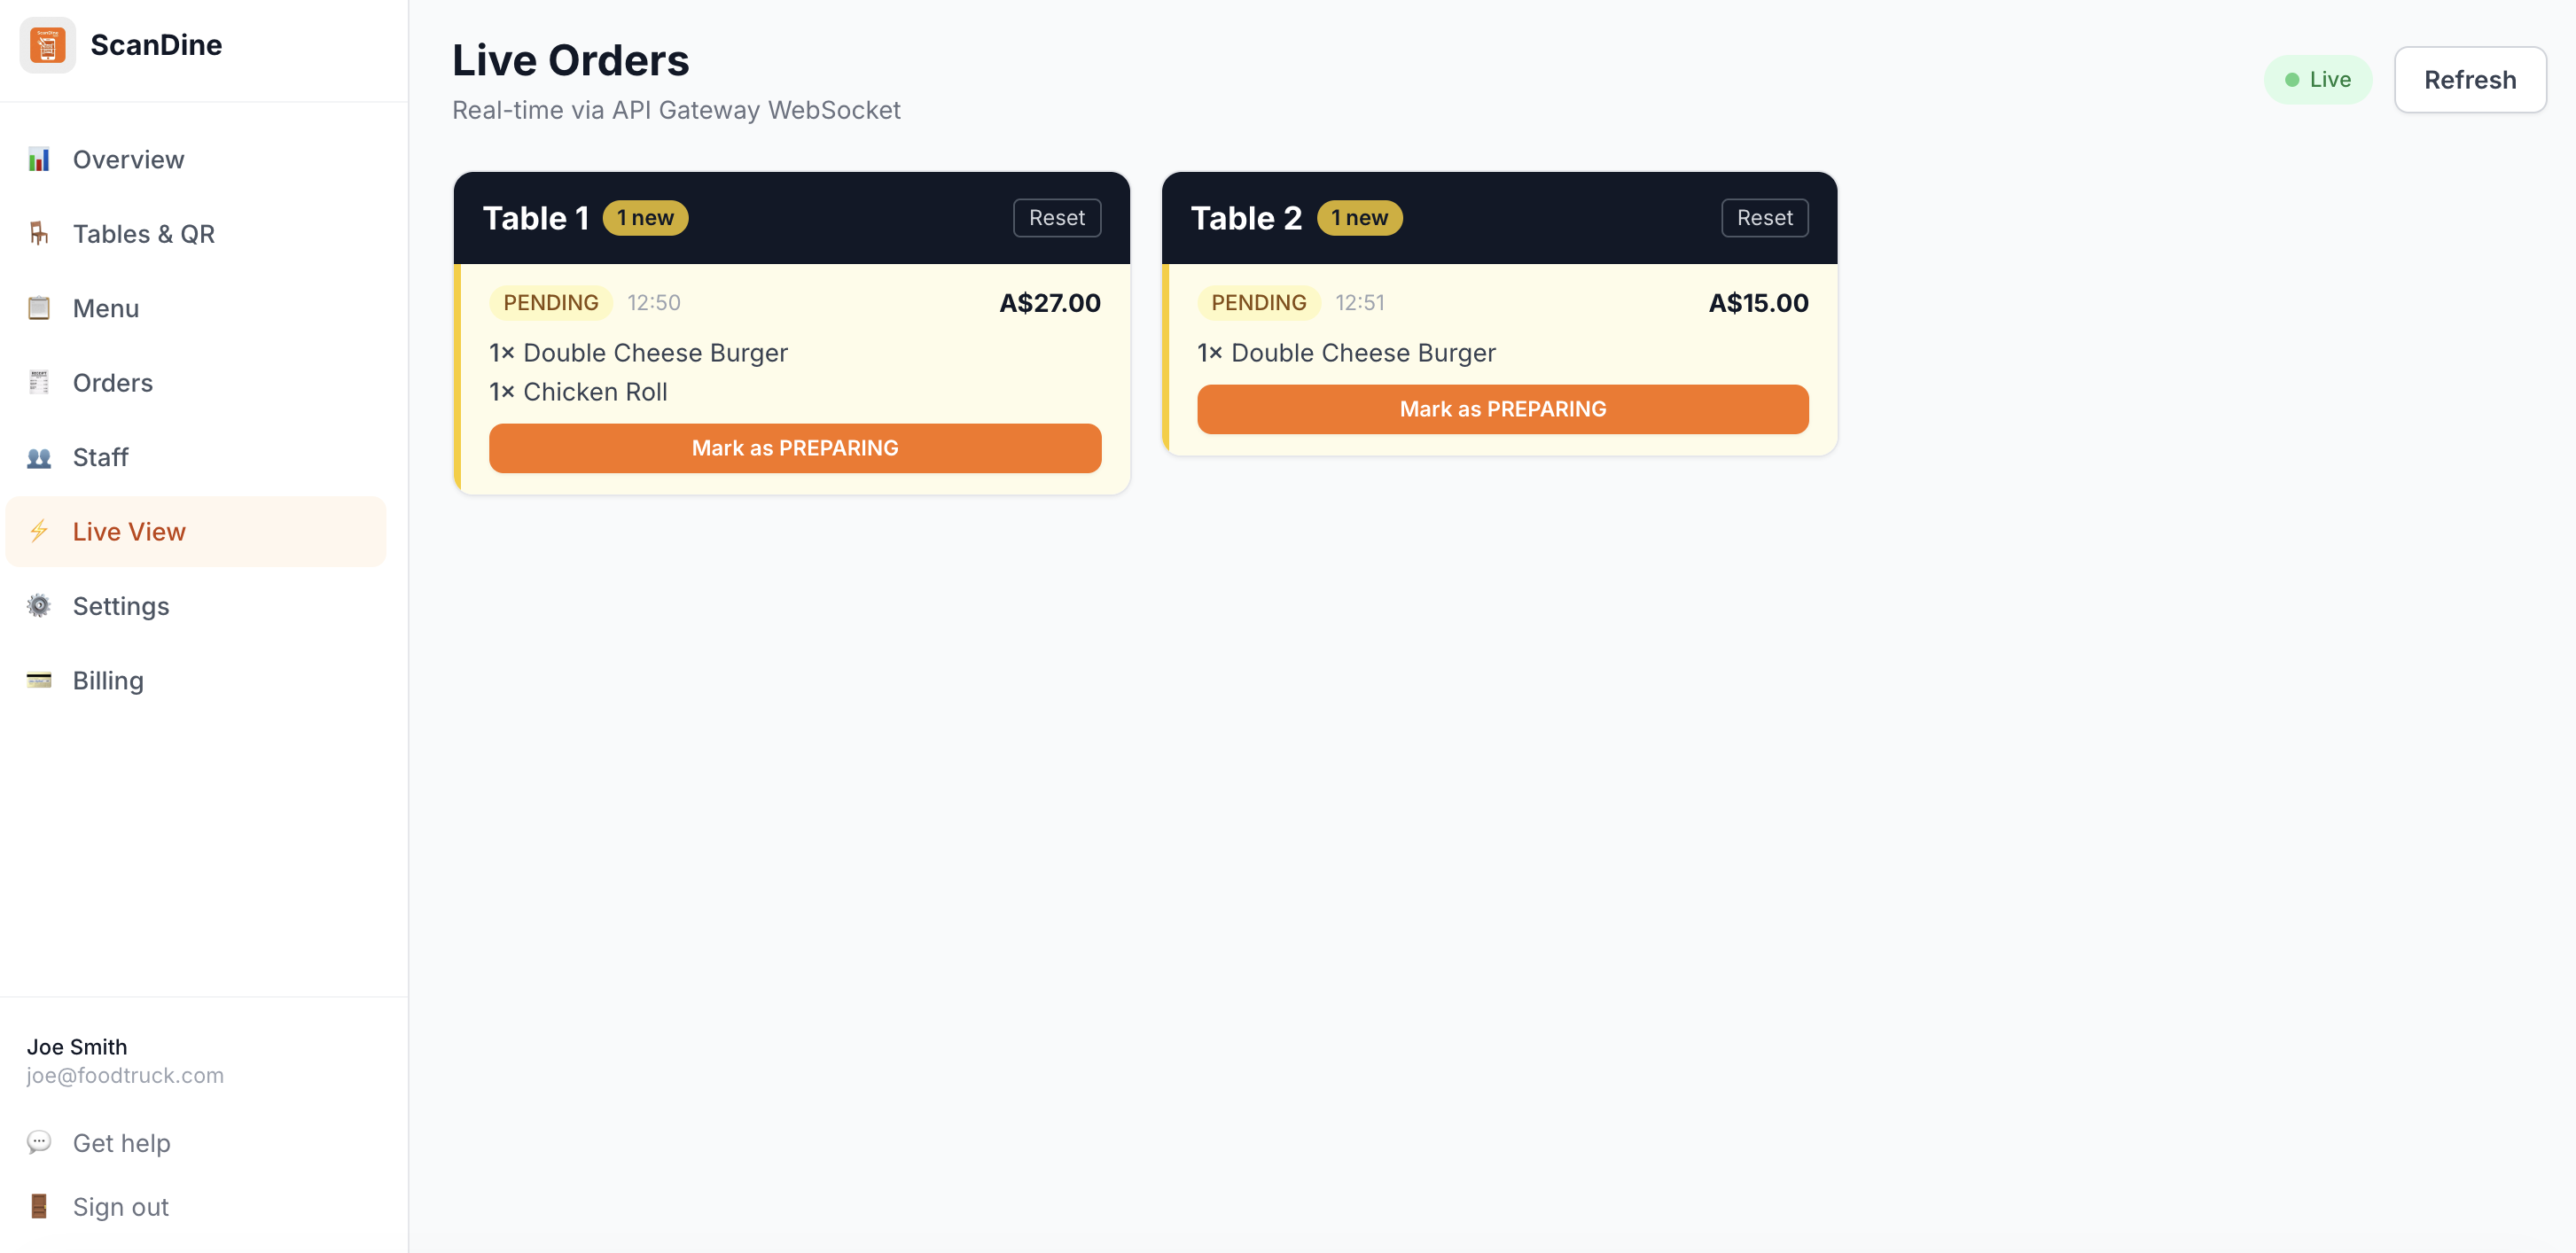
Monitor orders in real time
Open the Live Orders view on any device — phone, tablet, or desktop. New orders appear instantly with a beep alert. Tap an order to update its status as you go.
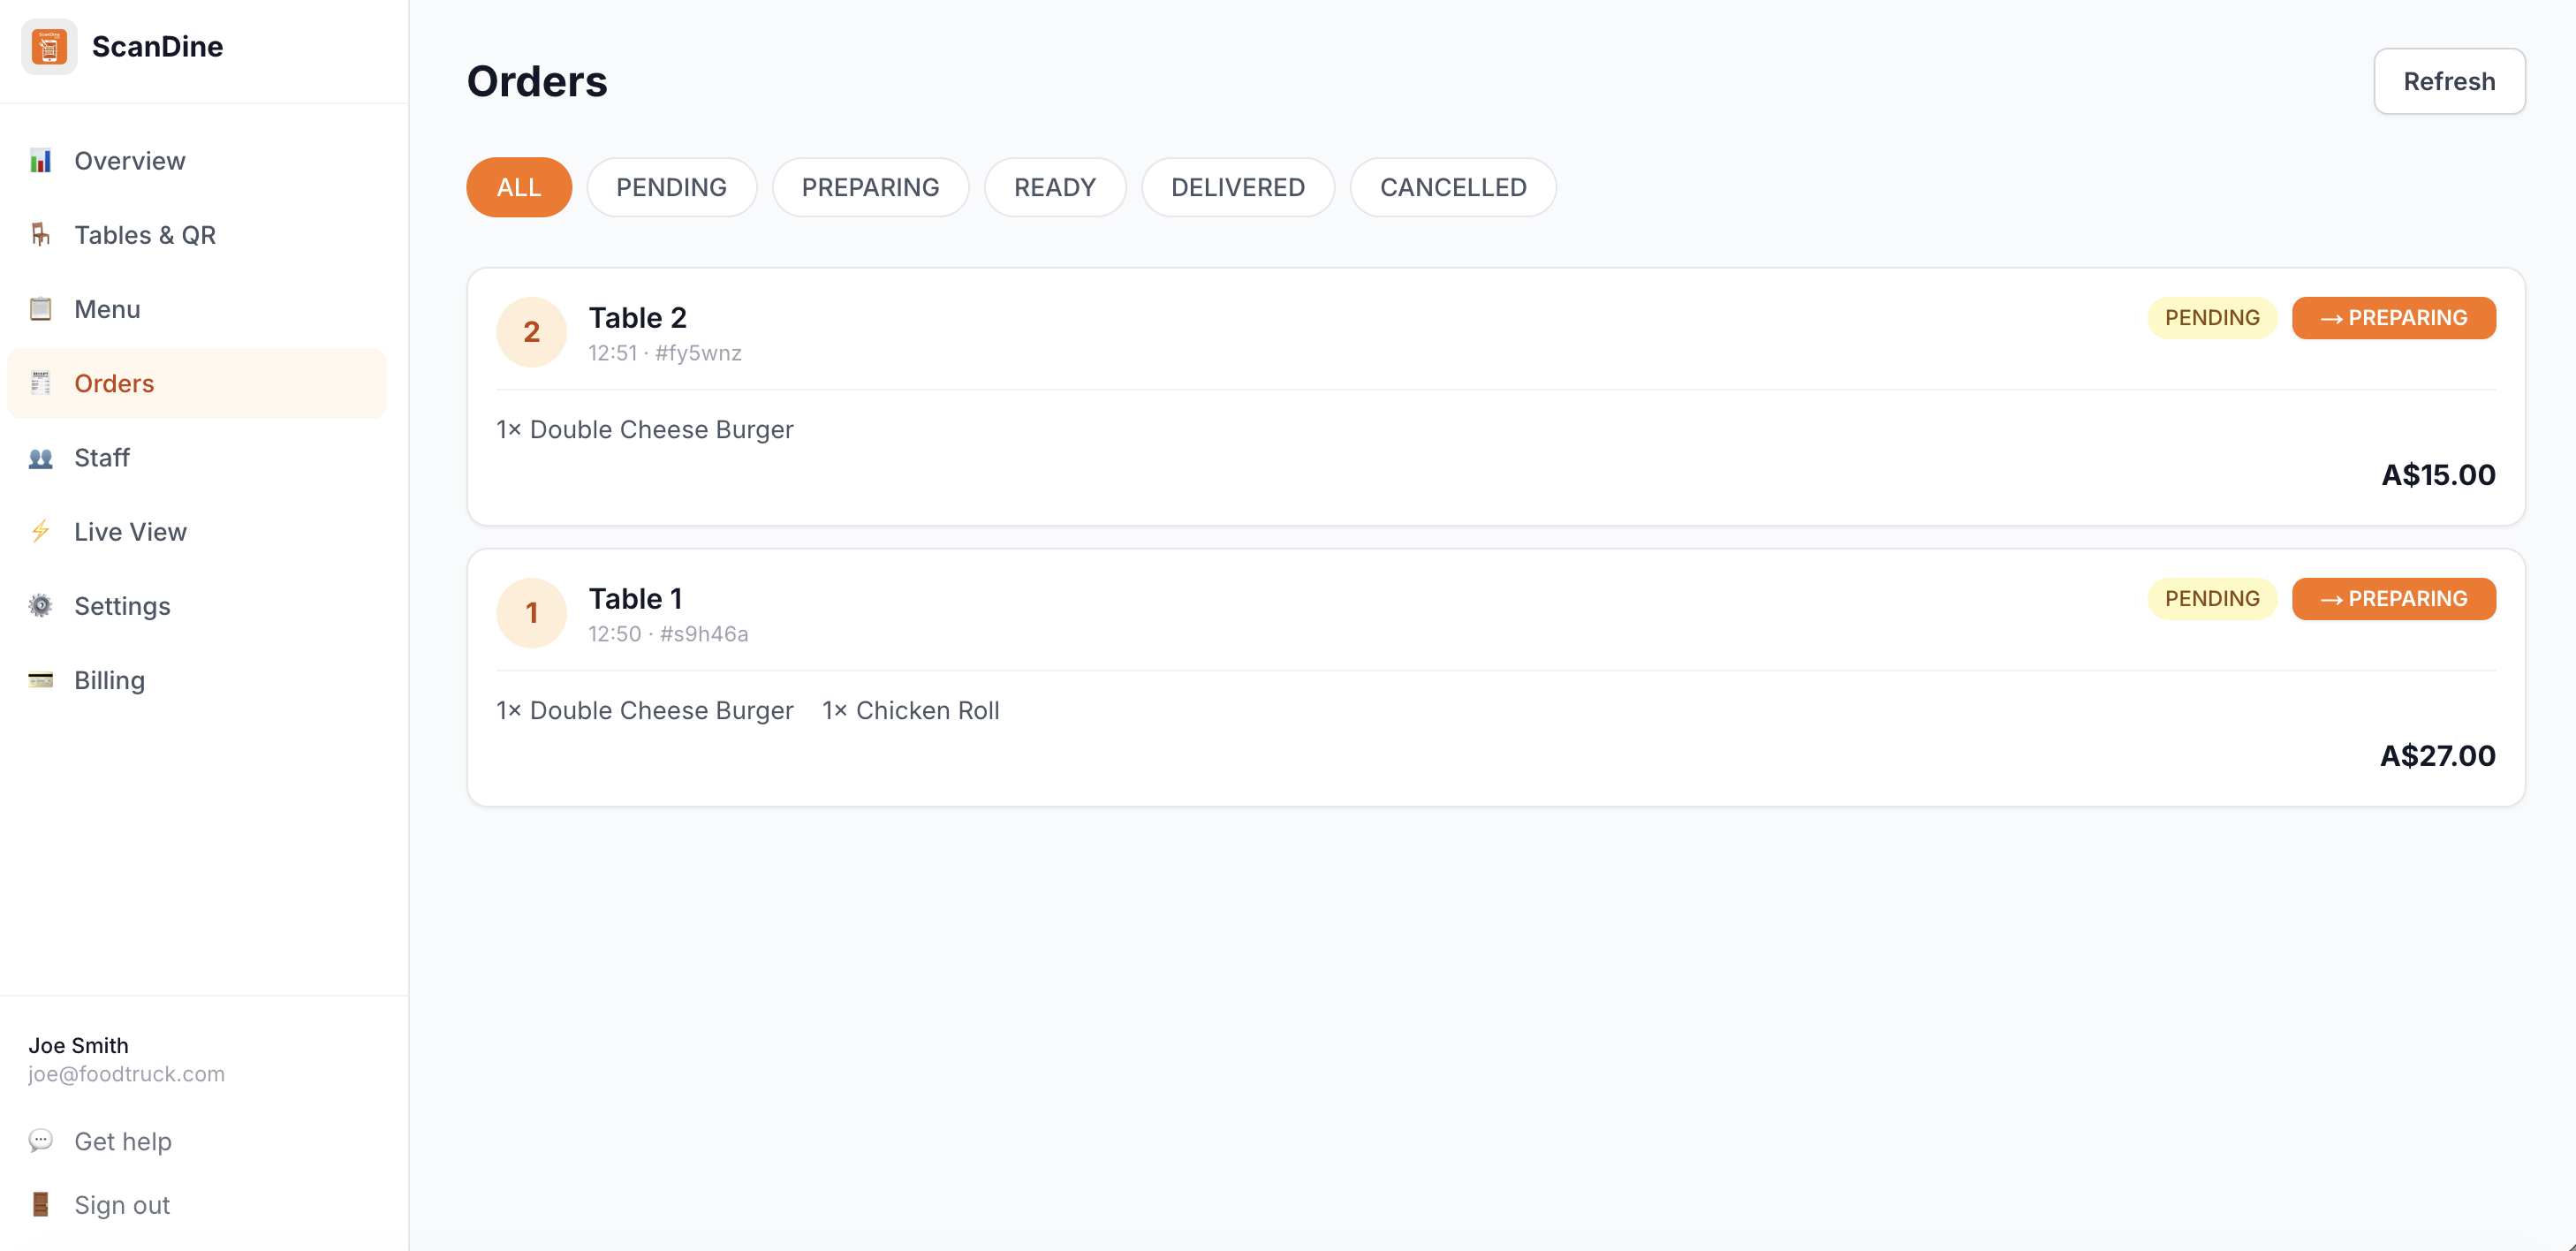
Review order history
The Orders page shows every order with status, items, total, and timestamp. Use this for end-of-day reconciliation or to track popular dishes.
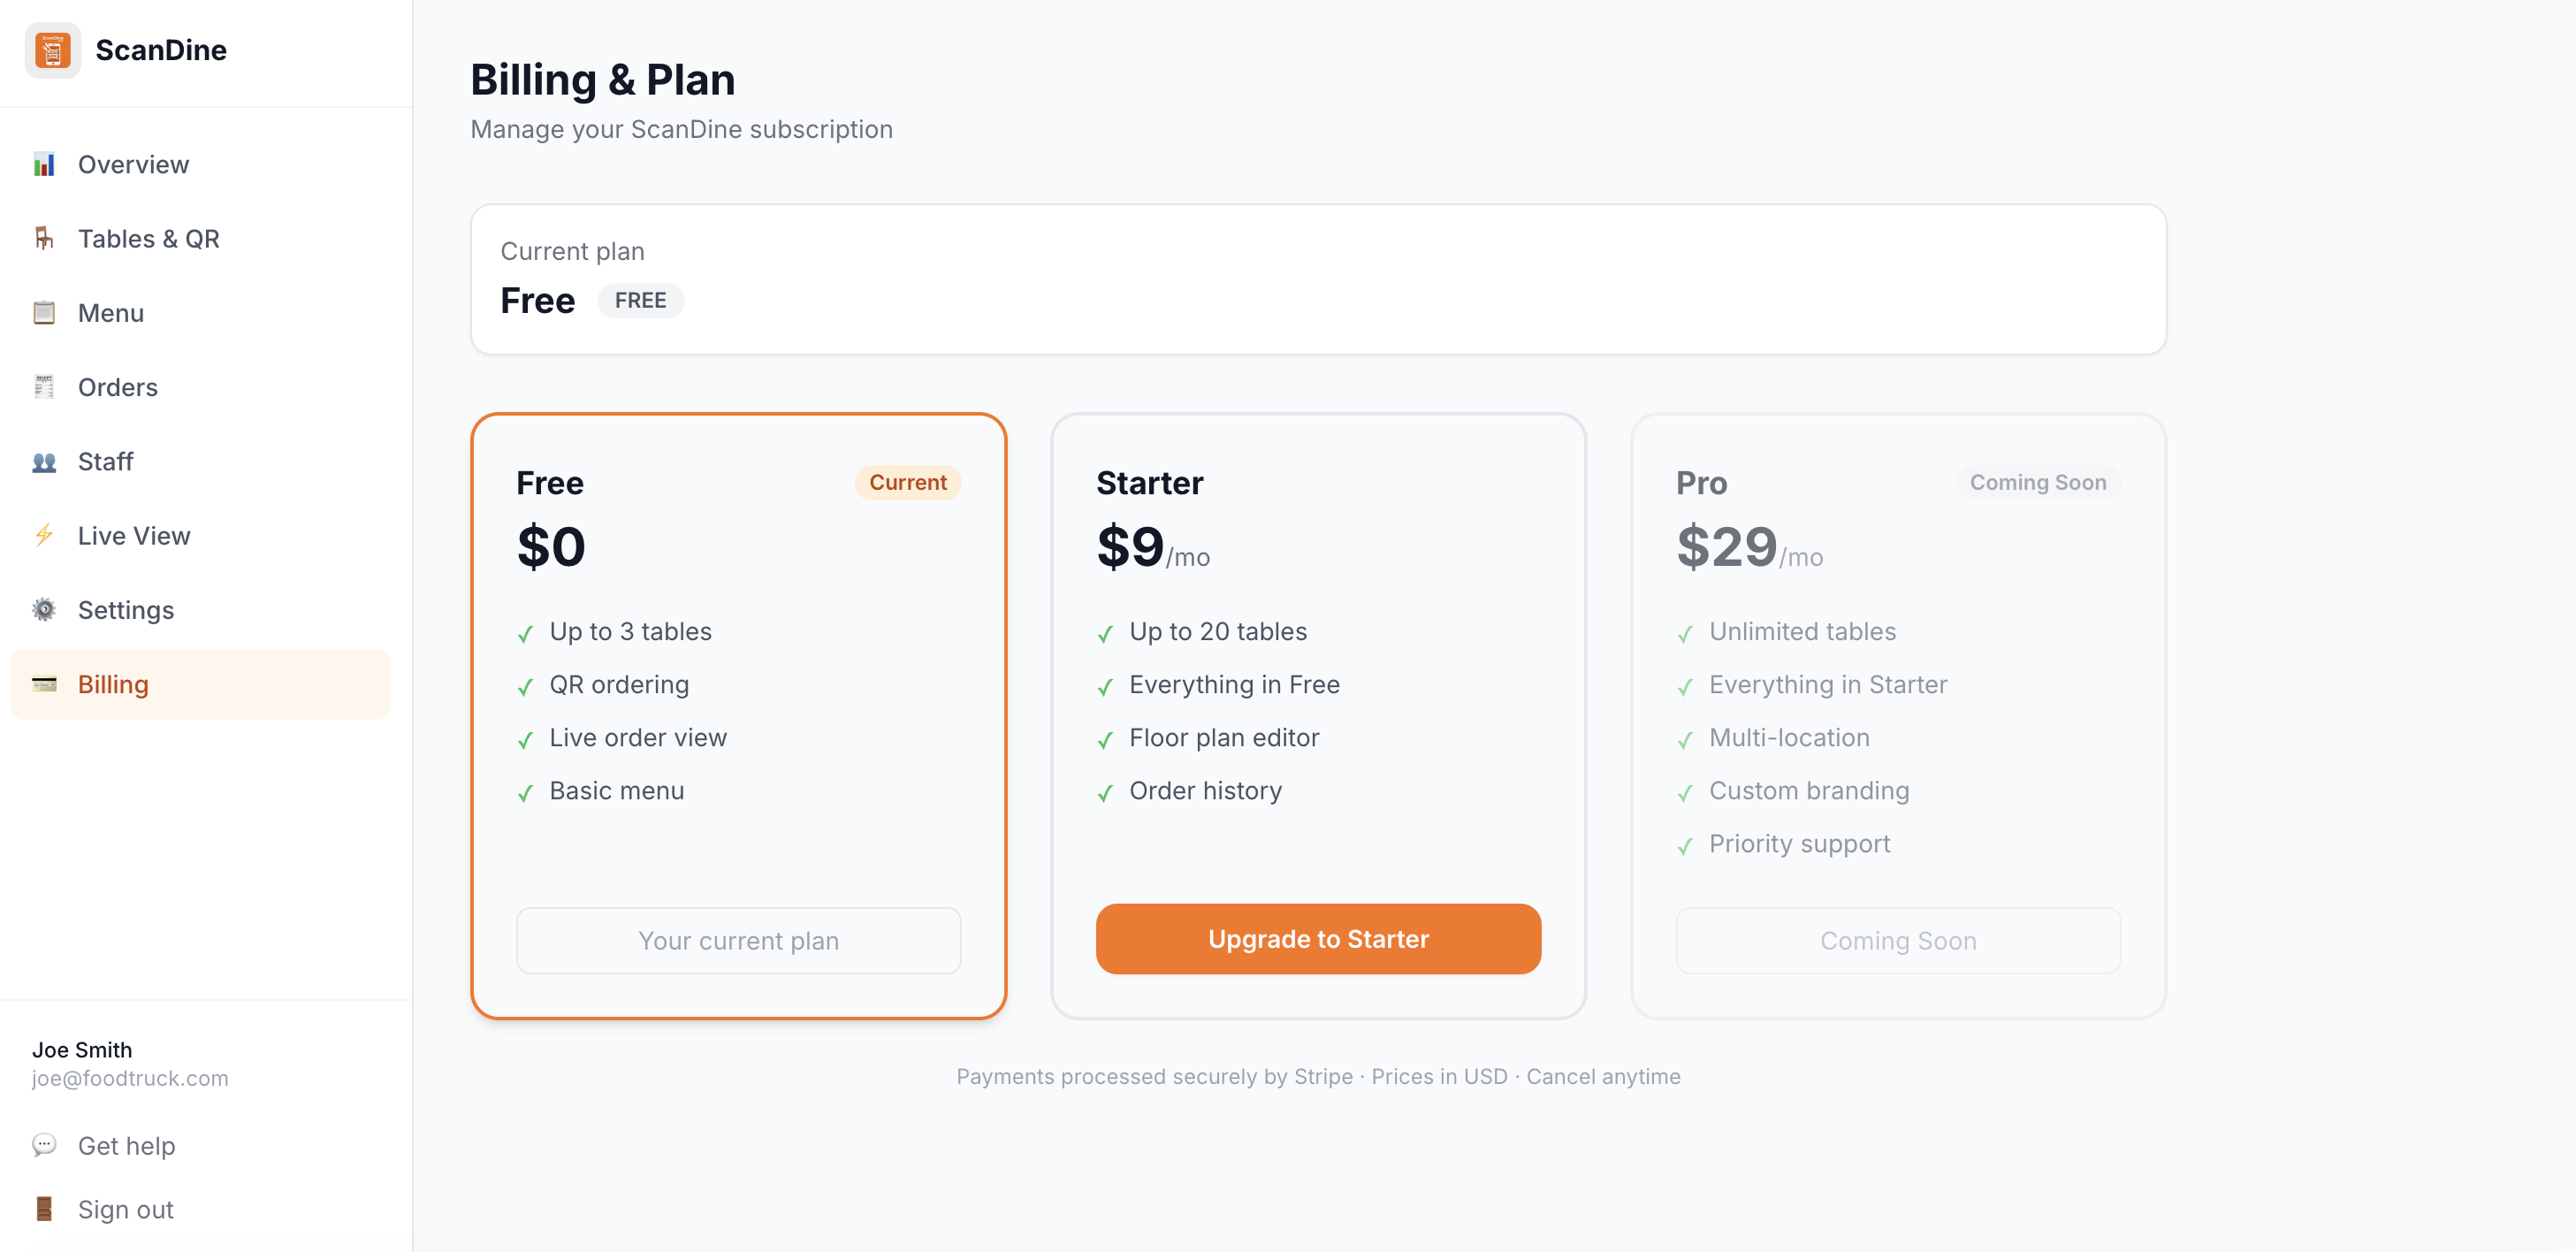
Manage your plan
Go to Billing to upgrade to Starter or Pro. Upgrades take effect immediately. You can manage or cancel your subscription at any time from the billing portal.